This document explains how to set up the physical parts of the product. Complete these steps before you install the product software on your computer.
Setting Up the Printer Hardware for HP Deskjet 1000 (J110), 2000 (J210), 3000 (J310), and HP Deskjet Ink Advantage 2010 (K010a) Printer Series
Introduction
caution:Do NOT connect the USB cable now. If you need a USB cable to connect the product to the computer, you will be prompted to connect it at the correct time during software installation.
note:The images in some of these steps might not look exactly like your product, but the steps are the same.
Step one: Unpack the printer
-
Remove the tape and cardboard from the outside of the product.Figure : Remove the tape from the outside of the product

-
Open the output tray, open the cartridge access door, and then remove the tape and cardboard from inside the product.Figure : Remove the tape and cardboard from inside the product

-
Close the cartridge access door.Figure : Close the cartridge access door

Step two: Check the contents of the box
The contents might vary by country/region. See the packaging for a list of items shipped in the box.
Step three: Connect the power cord and adapter
Connect the power cable to the back of the product, connect the power cord to the power supply, and then plug the power cord into a power outlet in the wall.
-
Connect the power cable to the back of the product
-
Connect the power cord to the power supply
-
Plug the power cord into an electrical outlet
Figure : Connect the power cord

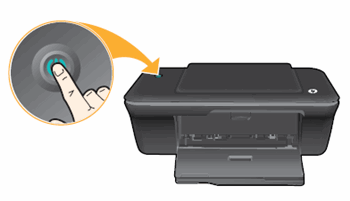
Step four: Turn on the power
Press the Power button ( ) to turn on the product.
) to turn on the product.
Figure : Turn on the product
Step five: Select the language and region (HP Deskjet 3000 (J310) printer series only)
This step applies only to the HP Deskjet 3000 (J310) printer series. If you do not have a product in this series, continue with the next step.
After turning the product on, a list of possible language settings displays on the product control panel. Use the following steps to set the default language and country/region for your product.
-
On the product control panel, press the button (
 ) next to the Down Arrow (
 ) to scroll through the languages, if necessary.
-
Press the button () next to OK to confirm your selection.
-
Press the button () next to the Down Arrow () to scroll through the regions, if necessary.
-
Press the button () next to OK to confirm your selection.
Figure : Select your language and region from the product control panel

Step six: Load plain paper
Follow these steps to load plain paper into the product.
-
If the product is not already on, press the Power button (
 ) to turn it on.
-
Lift the paper tray.Figure : Lift the paper tray

-
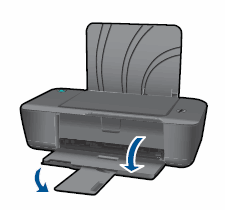
Lower the output tray, and then pull the tray extender out.Figure : Lower the output tray
-
Slide the paper width guide to its outermost position.Figure : Slide the paper width guide

-
Load unused, plain white, U.S. letter or A4 size paper in the tray with the short edge forward and the print side up.Figure : Load paper in the tray

-
Slide the paper width guide to the right until it stops at the edge of the paper but does not bend the paper.Figure : Slide the paper width guide to the right

Step seven: Install the cartridges
-
Open the cartridge access door. The carriage moves to the center of the product. Wait until the carriage is idle and silent before you continue.Figure : Open the cartridge access door

-
Remove the new cartridge from its package, and then carefully pull the pink pull tab to remove the plastic tape.
caution:
Do not touch the copper-colored contacts or ink nozzles. Also, do not re-tape the cartridges. Doing so can result in clogs, ink failure, and bad electrical connections.Figure : Remove the plastic tape
-
Hold the cartridge by its sides with the nozzles toward the product, and then insert the cartridge into its slot. Make sure that the icon on the cartridge matches the icon on the slot.
-
The tri-color cartridge (
 ) goes in the slot on the left
-
The black cartridge (
 ) goes in the slot on the right
Figure : Insert the cartridge into its slot
-
-
Push the cartridge forward into its slot until it snaps into place.Figure : Snap the cartridge into place

-
Repeat these steps to insert the other cartridge.
-
Close the cartridge access door.Figure : Close the cartridge access door
Step eight: Align the cartridges
-
Open the printer software.
-
Windows 8:If you are not using the latest version of Windows 8, the information in these steps might not match. You can get the latest version from the Microsoft Store.
-
Right-click the Start button (
 ) in the lower left corner of the screen, and then click Search.
-
Type HP in the search box.
-
Click your printer (
 ). The printer software opens.
note:
You can also open the printer software from your computer desktop: double-click the icon for your printer ( ).
).
-
-
Windows 7 or Windows Vista:Click the Windows icon (
 ), click All Programs, click HP, click the folder for your printer, and then click the icon for your printer (). The printer software opens.
note:
You can also open the printer software from your computer desktop: double-click the icon for your printer ().
-
Windows XP:Click Start (
 ), click All Programs, click HP, click the folder for your printer, and then click the icon for your printer (
 ). The printer software opens.
note:
You can also open the printer software from your computer desktop: double-click the icon for your printer ().
-
-
Double-click Printer Actions, and then double-click Maintenance Tasks. The HP Toolbox opens.
-
Click the Device Services tab, and then click Align Ink Cartridges. The printer aligns the cartridges and then prints an alignment page.
Enter a topic to search our knowledge library
What can we help you with?

Need Help?